Session Beer-- An enjoyer of a session beer can have several pints of them over a reasonable time in one sitting and still leave in a sober or close to sober condition.
I enjoy a well crafted session beer most of the time and the occasional ridiculous strength beer to expand the palate and imagination. Through my personal experience, it appears that a large segment of enjoyers of craft brews places the supersomething beers on a different tier of existence than well made session beers. It's no wonder some people look upon lovers of good beer as snobs. We need high-gravity, super hoppy beers, but we also need to know how to make exemplary session-strength beers as well.
I would propose a hypothesis that a high proportion of those who are constantly clamoring for superhoppy, superstrong, or superdark have, in fact, underdeveloped palates. I should interject that I also enjoy superbeers.
I recently made a well bodied, but lighter version of my stout and I find it absolutely delicious. It has enough roasty character to be tasted throughout a session, but it's not the black death against which many craft beer lovers would automatically compare it. I can make black death, but that's the superlative, not an evening with a mug in hand. One of my friends often falls prey to mass produced cheap beers, but asked me to bottle several liters for him to enjoy over Thanksgiving. He and I both very much enjoy the coffee undertones and mouthfeel of the oats, flaked barley, and wheat. This is a win, my friends, because I have not compromised quality and still pulled someone away from cheap beer.
Last night, I opened a bottle of my Hallertauer Amber which is slightly less than 5% alcohol, but balanced in favor of late hop additions. It's absolutely fantastic and the hops are a present and pleasant flavor. Again, it's a sessionable beer and it's wonderful.
One of the best beers I've had was a pilsner served at the bar at the Trump Towers in Chicago. It had a light body which was thoroughly flavorful and a delightfully spicy hoppy edge. Brewers of masterful lighter beers demonstrate infinitely more talent than those who can make a dime-a-dozen stout which oozes from the bottle or a beer which has been drowned in hops. It's far more difficult to hide behind a more delicate beer than motor oil.
In short, we need our superbeers (I, too, am a fan), but we also need to make sure that we are able to appreciate them as part of a variety. Imagine if the creator of the aforementioned heavenly Pilsner developed an IPA or a Stout...
Gudger & Ferguson

Gudger & Ferguson toasting at the first bar
Saturday, November 24, 2012
Sunday, November 18, 2012
A Couple Bottling Tips (Just bottled my Bride Ale)

These are just a few ideas to help with the bottling process. If you've bottled a few times then you probably won't need these, but they're great if you're new to it. Enjoy!
Tip #1: The Easy, Inexpensive Bottling Gun.
I learned this tip from Paul Young at My Old Kentucky Homebrew. Take a plastic tube which fits into a portable keg dispenser faucet and enjoy! I add the boiled sugar water into a keg, blanket it with CO2, push it with 5 psi, and dispense through the homemade bottling gun. I've used the Blichmann bottling gun on hundreds of growlers at my first brewing job and this works perfectly. The obvious benefit of the Blichmann bottling gun is that you can blanket the bottle with CO2 through the gun, but when you're carbonating with sugars you have to have air in the bottle for fermentation anyways.

Tip #2: Holster the Gun
This is something I learned from my first brewery. Keep a bottle of sanitizer so that the bottling gun has a sanitary holster as you move about your bottling processes.

Tip #3: Dishwasher Tray
Bottling trees cost money and take up space. As long as someone else in your household won't stab you for it, simply roll the bottom rack out of the dishwasher and make sure it's off of its wheels.

Tip #4: Put the Caps in Sanitizer
This is another trick I learned at my first brewery with growlers. You don't know where the caps have been or what bacteria may be lurking in your bottling area. Use just enough sanitizer to cover the caps and be sure to dry any unused caps when you're done so they don't rust on the edges.

Flexibility and Growth in a Brewing Rig
It's tempting to make a shiny, fixed brewing rig. Hard lines and control panels are extremely sexy. Someday I will have this sort of rig, but I am constantly adjusting, experimenting, and improving the setup to accommodate new ideas and slight improvements. It is because of this that I have a frame made from slotted angle steel and braided lines. When I no longer require somewhat regular changes to my setup I'll weld a custom frame and install hard lines.

 Twice now I have taken pieces of angle steel and reconfigured the frame itself. It's essentially a large Erector set and can be changed with wrenches and a hacksaw. It's also great when you want to move a hot liquor tank burner, pump, or wort chiller. The possibilities are endless and easy.


 Twice now I have taken pieces of angle steel and reconfigured the frame itself. It's essentially a large Erector set and can be changed with wrenches and a hacksaw. It's also great when you want to move a hot liquor tank burner, pump, or wort chiller. The possibilities are endless and easy.
I recently raided my local hardware store for 1/2 inch valves, fittings, tubing, and hose clamps. From this I have created a ridiculous web of possibilities for liquid transferrance. My goal is to make it "as simple as possible, but not simpler." Thank you, Einstein. After tightening all the clamps once, though, it is inevitable that the rubber will give some and hot temperatures will loosen the connections. The first few times this method is used you will have to be on the lookout for tiny leaks and crank the clamps back down. It's also important to be able to move water from the hot liquor tank through all the lines in order to push wort and keep air out. After only one use I already have plans for adjustments.
In short, it's extremely beneficial to be able to adjust and develop your brewing rig to your methods.
Monday, November 12, 2012
The Gudger & Ferguson Step Mashing Method (a more affordable HERMS system)
Most all-grain brewers employ a single temperature mashing method. This mash is a single temperature rest between 148F and 158F, depending on the brewer's preference of fermentability and mouthfeel. This is also known as the Infusion Mash. There are three other common mashing methods which incorporate the use of multiple increasing temperature rests.
Both Decoction Mashing and Step Mashing below often utilize the following temperature rests:
97F - Acid Rest
120-134F - Protein Rest
148-158F - Normal Saccarification Rest (Infusion Mash Temperature)
170 - Mash-out Temperature
1) Decoction Mashing is a process by which a specific amount of the mash is removed, boiled, then returned to the whole mash in order to raise the temperature of the whole mash to a predetermined amount. Below is a sample Decoction Mashing schedule:

2) Step Mashing -- RIMS (Recirculating Infusion Mash System) is similar, but involves carefully heating the mash to these temperatures with direct heat. This means either a brew kettle over a heat source is used as a mash tun or it is directly exposed to an electric immersion heater.
3) Step Mashing -- HERMS (Heat Exchange Recirculating Mash System) involves warming the mash through a medium such as water by way of a copper, or other, coil. This takes the direct heat away from the mash itself.
Decoction, RIMS and HERMS have drawbacks :
--Decoction Mashing involves pulling grains out of the main mash, which can be awkward and messy. It also means boiling some grain in the decocted portion, which can impart some harsher flavors from the husk of the grain. Boiling also denatures enzymes necessary for mashing.
--RIMS applies direct heat to the mash which can result in off-flavors and requires constant stirring. A brew kettle which is employed as a mash tun also loses heat, particularly with smaller batch sizes. My version of HERMS solves all of these problems.
--My system is a HERMS, but saves a lot on the cost of a typical setup. It's also easy to try out with usual brewing equipment you may already have without spending money.
I have recently tested a new method which is similar to Decoction and Step Mashing, but without any of the detrimental effects of either one.
The Gudger & Ferguson Step Mashing Method (AKA, the simplest form of the 3) HERM System)

My method warms the mash efficiently to each increasing temperature by circulating the mash from the mash tun, through a copper coil placed in a pot with heated water, then back into the top of the mash tun. This is normal all-grain circulation, but it includes the warming apparatus. I have created this warming apparatus by filling the brew kettle with water which is warmed to each progressive temperature with a burner and running the mash through a copper coil which is placed into the kettle.

This process worked beautifully the first time and achieved each incremental temperature quickly and efficiently.


I envision a permanent version of this which could be heated with an immersion chiller and regulated with a thermostat control (I have the Johnson Controls A 419). I searched the US Patent Office database, however, just to discover this exact device is already patented and utilized by a construction company in Ashland, TN for another application. You can still utilize the principal, though.
I hope this gives you something to think about and if you have tried this already or have feedback on the design, please leave me a message. Enjoy!
Thursday, October 18, 2012
Der Bierbreuwer

rich and sweet and bitter fashion.
In a wide and big copper I then cast the hops.
Then [after boiling the wort] I leave it to cool,
and therewith I straightway fill the well-hooped and well-pitched vat;
then it ferments, and the beer is ready."
It's really that simple and it's easy to get caught up in equipment and forums and the like. I'll be hanging this on my wall soon. As Papazian says, "Relax, have a homebrew."
Sunday, October 14, 2012
Gudger's Top 3 Cigars
These are three of my favorite cigars which I would recommend to anyone. They are all relatively consistent and can be found at most tobacconists' shops.
 This is my all-time reliable, flavorful cigar which doesn't break the bank. I'm not going to do a flavor review, but I like smooth, dark, earthy flavors in a cigar and this covers all of them. It's well constructed and burns all the way to a nub with consistent flavor and enjoyment. All of the Oliva V series are great, but the particular shape of the Belicoso has struck a chord with my particular preference of drawing. As it costs less than ten dollars it is a phenomenal value.
 This is one of the best constructed, solid cigars on the market. It puts out a lot of pleasant, cool-burning smoke. It can take a hobo and make him look like an aficionado because of the ease with which is summons forth great flavor and full, wispy smoke. Of course it has the refined character of a complex strong ale which has been allowed to mature and its flavors to mingle into one great experience. I highly recommend it for special occasions as it is in the ballpark of $20.
 One of my friends (the ampersand of G&F, in fact) introduced me to this cigar on a special occasion when I was new to cigars. I didn't fully appreciate it at the time, because, I suspect, it was spicy and my untrained palate believed that to be hot smoke and not flavor. Now, however, it's one of my favorites, because of its superior construction, consistent draw, and well balanced spicy overtones. A couple of years ago it was difficult to find these as they were rationed out to certain cigar stores, but as of this last six months or so, in particular, they've been more attainable. The various sizes range from the mid-teens in price on up toward twenty dollars.
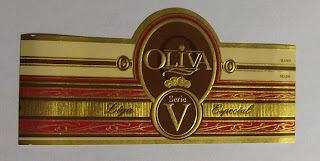
Oliva V Belicoso
 This is my all-time reliable, flavorful cigar which doesn't break the bank. I'm not going to do a flavor review, but I like smooth, dark, earthy flavors in a cigar and this covers all of them. It's well constructed and burns all the way to a nub with consistent flavor and enjoyment. All of the Oliva V series are great, but the particular shape of the Belicoso has struck a chord with my particular preference of drawing. As it costs less than ten dollars it is a phenomenal value.
Padron Serie 1926
 This is one of the best constructed, solid cigars on the market. It puts out a lot of pleasant, cool-burning smoke. It can take a hobo and make him look like an aficionado because of the ease with which is summons forth great flavor and full, wispy smoke. Of course it has the refined character of a complex strong ale which has been allowed to mature and its flavors to mingle into one great experience. I highly recommend it for special occasions as it is in the ballpark of $20.
Fuente Fuente Opus X
 One of my friends (the ampersand of G&F, in fact) introduced me to this cigar on a special occasion when I was new to cigars. I didn't fully appreciate it at the time, because, I suspect, it was spicy and my untrained palate believed that to be hot smoke and not flavor. Now, however, it's one of my favorites, because of its superior construction, consistent draw, and well balanced spicy overtones. A couple of years ago it was difficult to find these as they were rationed out to certain cigar stores, but as of this last six months or so, in particular, they've been more attainable. The various sizes range from the mid-teens in price on up toward twenty dollars.
In summation, the Fuente Fuente Opus X is particularly characteristic to me with its spicy overtones, the Padron Serie 1926 is smooth, complex, and well statured, and the Oliva V Belicoso is the best priced aficionado's cigar. After trying them all you'll discover that your palate has already relocated itself to a better vantage point.
Blending Yeasts -- A new depth of flavor
I can't recall finding a recipe which includes more than one yeast. I'm sure they're out there and you've seen one, but it's uncommon nonetheless. I recently created my finest brew to date and it used a blend of two very different, yet complementary yeast strains. This occurred when I was assembling the ingredients for a 9% Belgian Ale and was about to pick up that second Wyeast "Belgian Yeast" package to provide a reasonable cell count for the nine points of alcohol. As exemplerary Belgian beers are known for their depth, why not include a different strain and add some undertones to the finished product. The "Belgian Yeast's" partner was a German strain of "Hefeweizen Yeast."
After fermenting and carbonating the Belgian ale we were coming up on hosting an engagement party and, after only three weeks from the brew date, liked the immature flavor of the Belgian ale more than the kolsch which was intended for the party. It was fully attenuated and should have sat for months, but it was a phenomenal beer reminescent of St. Bernardus. I'm conservative in the promotion of the quality of my brews, but this was the best American made Belgian I'd ever had. At the end of the party a gallon of this brew remained, mainly though, because of its strength and the availability of an easy drinking spiced pumpkin ale also at the party. I put it back in the storage fridge so I could wow people in the future.
Two weeks later I bottled it to use the keg for other purposes. The Hefeweizen yeast had strongly entered the arena and presented beautiful banana and clove flavors! This was the deceptively strong offspring of St. Bernardus and Schneider Aventinus! The chemistry and biology surrounding the blending of yeast strains are deep waters, but "Truth in Taste" will always be the litmus test for any brew.
I intend to repitch this combination several times with an eager anticipation of unexpected delicious outcomes and have already begun fantisizing about other potentially optimal pairings. If you have done this, tell us what you've experienced.
PS- My computer has not been working with the picture uploader recently. I'm working on it and hope to have pictures for the last several posts soon.
Wednesday, September 26, 2012
The Brewing Process: 4) Production Brewing
1) Basic Equation -- The foundational definition of making beer.
2) Extract Brewing -- The process used by beginning home brewers.
3) All-Grain Brewing -- The full process which is used in breweries, but at home.
4) Production Brewing -- Some key differences between the experiences of home brewing and working in a microbrewery.
4) Production Brewing

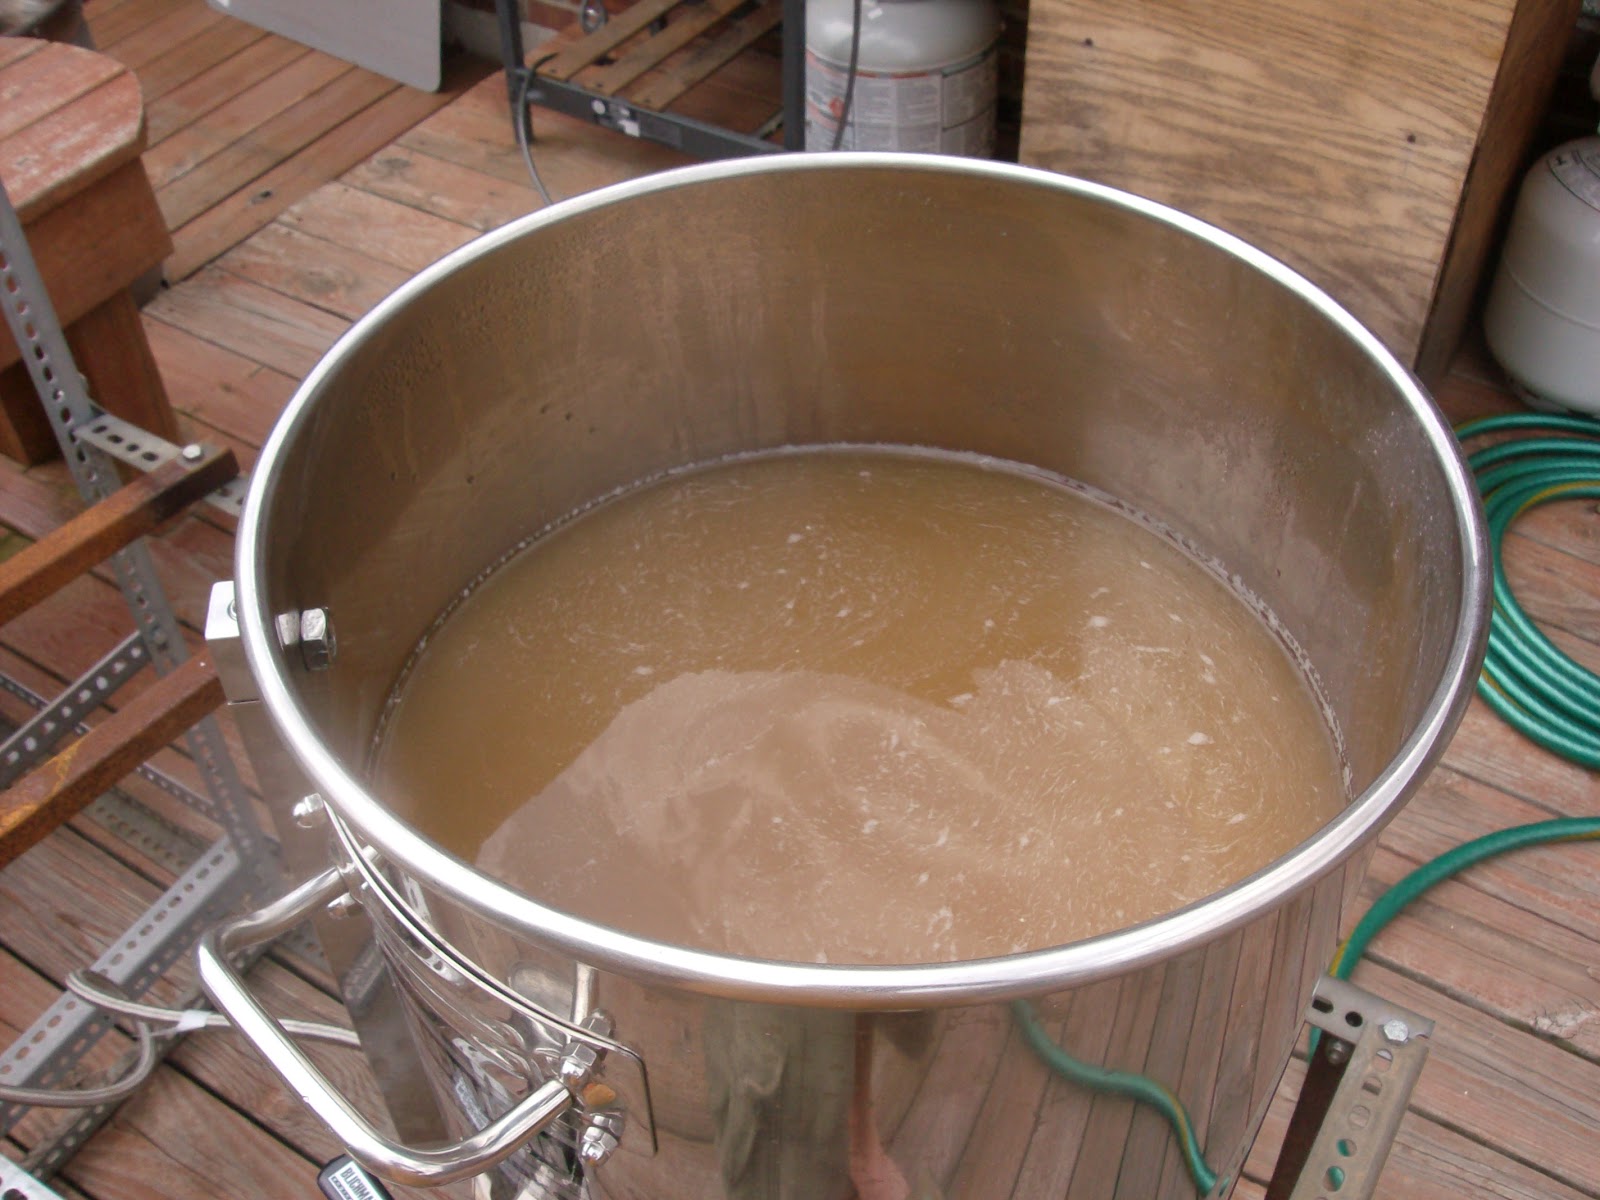
Picture: [Lower Right] Filling kegs from the bright tank
[Right] CO2 tank pressurizing bright tank for keg filling because main tank ran out
[Center] Spent grains are being removed from mash tun using a hard rake into plastic containers
[Off Left] Cart used to run spent grains to grain trailer out back
As you'd expect, a production brewery does all the same basic things as an all-grain homebrewer. Below are some differences by topic.
Sanitation - This is the subject on which brewers are most picky, because it only takes one aggressive biological invader to ruin a batch of beer and the economic success of the brewery. In many breweries used implements and hoses are placed in a caustic soak, then moved to iodophor where they will remain until they are hosed off and used again. When handling the seals between fittings, make sure to keep your fingers on the outside, lest you contaminate the connection. It's successfully performing lots of little procedures like these which can ease the nerves of those who have let you into their brewery. I have heard of successful breweries which have, at one time or another, had to dump an entire batch of thirty or more barrels of brew and take the economic hit due to the tiniest of procedural overlookings.
Being Wet - Between cleaning and brewing you will have a lot of contact with water and other liquids. Towards the end of my summer with my last brewery I got a massive soaking in my boots of water and spent the last two weeks trying to dry them out and suffering for it. It's alright for all of you to be soaked except for your feet. On the average of once a summer I have accidentally sprayed myself with beer while filling kegs. Always check all of your valves and never allow yourself to engage your auto-pilot or you will get a hoppy hosing to the face. It's best to try to stay dry and accept it when you receive a dousing. At one of my breweries one of the brewers, thinking the large capacity hot liquor tank was empty opened the hatch and covered the floor of the brewery with a flood of 170F water.
Physical - When I showed up each summer at either of my breweries the guys there had become well conditioned to the physical strain of the job. I do not work a physical job the rest of the year and end up in pain for approximately two weeks until I have become acclimated to the requirements of the job. Like many other physical jobs, though, you just have to show up, work, ache, and wait for that third week. Most of the strain is attributed to tasks like moving full kegs of beer, handling 50 lb. sacks of grain, and removing the hot, soaked spent grains after the mash. Keep in mind a single batch for 15 bbl of beer can use 800 lbs. of grain and yield 30 160 lb. kegs. My first brewery brewed 30 bbl at a time. I regularly crawled into the emptied mash tun to clean it out while it was still well over 100F and extremely humid.
Good Company - In most areas of employment politics are ever present and difficult to avoid. While politics exist, one great thing about the brewing industry is that its workers tend to be easier to work with. In my opinion, people don't fall into a paid brewery job without first actually enjoying it. There are enough people who want to do it, so jerks don't tend to get hired. There are a lot of easier jobs out there which pay a lot more, so I'm sure that uninterested people don't even invest the incredible amount of effort to get in the door.
Danger - There are dangerous aspects of being in a brewhouse which need mentioning. There are going to be hot pipes near the brewing rig. At one brewery there is a pipe at ankle height which borders the platform on which you stand to look in the kettle. After a couple of nice marks I was able to remember to keep my distance. One common disaster in the brewhouse is reaching into a bucket to get a fitting when it wasn't sitting in iodophor or something relatively safe, but actually in an acidic cleaner. I've heard stories of skin being schluffed off of the arm where it was contacted by powerful cleaners. One quick fix is to open a small sampling valve on a fermentor and hose the area with beer. Oh yeah, everything's wet and kegs are heavy. Billy goats would do well here.
Adaptation - Unless you work for a huge fancy brewery, things will constantly occur with equipment and brewing processes. Boilers will need repair, drains will clog around the brewing rig, blow-off valves will function at the wrong PSI, the CO2 will run out, and some growlers will be made with unusually weak glass. Working in a brewery means being able to underatand the variables of the situation and manipulate them to keep the brew intact and delicious. Someone once said "Brewers are engineers and winemakers are farmers." I agree with the brewing side and suspect that winemakers are largely dependent on their ability to deal with the grapes pre-fermentation.
Cleaning - There's never downtime in brewing. There is cleaning. Kegs, the outside of fermentors, etc. Just as soon as you scrub and stack 50 kegs, 55 more show up. This involves using a keg washer system which is kind of neat. Kegs are loaded into the machine to be washed out, cleaned, sanitized, and purged with CO2. There's not a lot to say in this section, but it's a massive proportion of the work. hmm
It's a ton of work, but it's definitely worth it to sharpen up your skills and get into physical shape!
2) Extract Brewing -- The process used by beginning home brewers.
3) All-Grain Brewing -- The full process which is used in breweries, but at home.
4) Production Brewing -- Some key differences between the experiences of home brewing and working in a microbrewery.
4) Production Brewing
Snapshot from a day at the brewery

Picture: [Lower Right] Filling kegs from the bright tank
[Right] CO2 tank pressurizing bright tank for keg filling because main tank ran out
[Center] Spent grains are being removed from mash tun using a hard rake into plastic containers
[Off Left] Cart used to run spent grains to grain trailer out back
As you'd expect, a production brewery does all the same basic things as an all-grain homebrewer. Below are some differences by topic.
Sanitation - This is the subject on which brewers are most picky, because it only takes one aggressive biological invader to ruin a batch of beer and the economic success of the brewery. In many breweries used implements and hoses are placed in a caustic soak, then moved to iodophor where they will remain until they are hosed off and used again. When handling the seals between fittings, make sure to keep your fingers on the outside, lest you contaminate the connection. It's successfully performing lots of little procedures like these which can ease the nerves of those who have let you into their brewery. I have heard of successful breweries which have, at one time or another, had to dump an entire batch of thirty or more barrels of brew and take the economic hit due to the tiniest of procedural overlookings.
Being Wet - Between cleaning and brewing you will have a lot of contact with water and other liquids. Towards the end of my summer with my last brewery I got a massive soaking in my boots of water and spent the last two weeks trying to dry them out and suffering for it. It's alright for all of you to be soaked except for your feet. On the average of once a summer I have accidentally sprayed myself with beer while filling kegs. Always check all of your valves and never allow yourself to engage your auto-pilot or you will get a hoppy hosing to the face. It's best to try to stay dry and accept it when you receive a dousing. At one of my breweries one of the brewers, thinking the large capacity hot liquor tank was empty opened the hatch and covered the floor of the brewery with a flood of 170F water.
Physical - When I showed up each summer at either of my breweries the guys there had become well conditioned to the physical strain of the job. I do not work a physical job the rest of the year and end up in pain for approximately two weeks until I have become acclimated to the requirements of the job. Like many other physical jobs, though, you just have to show up, work, ache, and wait for that third week. Most of the strain is attributed to tasks like moving full kegs of beer, handling 50 lb. sacks of grain, and removing the hot, soaked spent grains after the mash. Keep in mind a single batch for 15 bbl of beer can use 800 lbs. of grain and yield 30 160 lb. kegs. My first brewery brewed 30 bbl at a time. I regularly crawled into the emptied mash tun to clean it out while it was still well over 100F and extremely humid.
Good Company - In most areas of employment politics are ever present and difficult to avoid. While politics exist, one great thing about the brewing industry is that its workers tend to be easier to work with. In my opinion, people don't fall into a paid brewery job without first actually enjoying it. There are enough people who want to do it, so jerks don't tend to get hired. There are a lot of easier jobs out there which pay a lot more, so I'm sure that uninterested people don't even invest the incredible amount of effort to get in the door.
Danger - There are dangerous aspects of being in a brewhouse which need mentioning. There are going to be hot pipes near the brewing rig. At one brewery there is a pipe at ankle height which borders the platform on which you stand to look in the kettle. After a couple of nice marks I was able to remember to keep my distance. One common disaster in the brewhouse is reaching into a bucket to get a fitting when it wasn't sitting in iodophor or something relatively safe, but actually in an acidic cleaner. I've heard stories of skin being schluffed off of the arm where it was contacted by powerful cleaners. One quick fix is to open a small sampling valve on a fermentor and hose the area with beer. Oh yeah, everything's wet and kegs are heavy. Billy goats would do well here.
Adaptation - Unless you work for a huge fancy brewery, things will constantly occur with equipment and brewing processes. Boilers will need repair, drains will clog around the brewing rig, blow-off valves will function at the wrong PSI, the CO2 will run out, and some growlers will be made with unusually weak glass. Working in a brewery means being able to underatand the variables of the situation and manipulate them to keep the brew intact and delicious. Someone once said "Brewers are engineers and winemakers are farmers." I agree with the brewing side and suspect that winemakers are largely dependent on their ability to deal with the grapes pre-fermentation.
Cleaning - There's never downtime in brewing. There is cleaning. Kegs, the outside of fermentors, etc. Just as soon as you scrub and stack 50 kegs, 55 more show up. This involves using a keg washer system which is kind of neat. Kegs are loaded into the machine to be washed out, cleaned, sanitized, and purged with CO2. There's not a lot to say in this section, but it's a massive proportion of the work. hmm
It's a ton of work, but it's definitely worth it to sharpen up your skills and get into physical shape!
Sunday, September 2, 2012


Subscribe to:
Posts (Atom)